Performance testing is a test technique that focuses on how the system behaves and performs. In real life, many software development teams tense to ignore this and only carry it out when it is requested. As a result, they always get “surprise” (e.g. system malfunction when under heavy traffic) in production. Thus, IMHO performance testing is a very critical and essential test that should be conducted on every enterprise application.
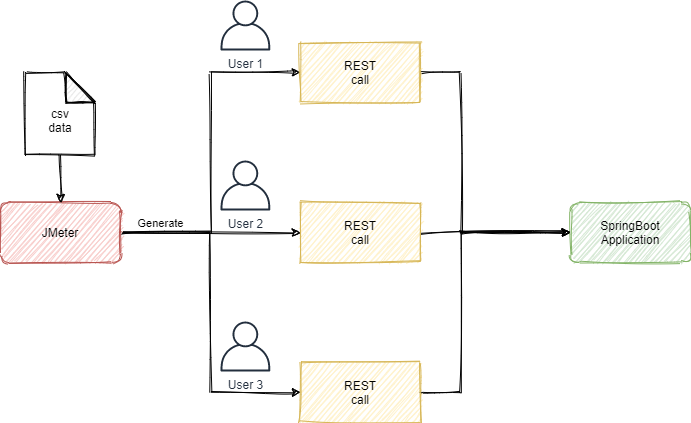
Over the year, I have carried few performance tests and in this article, I’m going to share with you the tool that I used to generate load.
JMeter
Apache JMeter is a very famous open-source tool that has been around for 20+ years. It is written in pure Java and this allows it to be run on any platform. It was originally designed for testing Web Applications but has since expanded to allows testing almost any application and protocol, enabling users to create tests by using a desktop application that is compatible with any OS platform.
Download: here
Springboot Application
I created a simple Springboot application which expose an endpoint /load.
1
2
3
4
5
6
7
8
9
10
11
@PostMapping(value = "/load")
public ResponseEntity response(@RequestBody Map<String, String> values){
    for (Map.Entry<String, String> entry : values.entrySet()) {
        if (values.containsKey("error")) {
            System.out.println("Bad Request with error");
            return ResponseEntity.badRequest().build();
        }
        System.out.println("Key : " + entry.getKey() + " | Value : "+ entry.getValue());
    }
    return ResponseEntity.ok().build();
}
Source code : here
Create Test Plan
In this article, we going to create a JMeter test plan that:
- Load data from CSV data file.
- Send request to Springboot application.
- Generate report.
JMeter provides a GUI that eases us to create the test plan(.jxm) without writing any line of code. However, it is not designed for running real performance tests.
-
Lunch JMeter GUI by execute
jmeter.bat(window) /jmeter.sh(linux). -
Right click on
Test Planand selectAdd>Threads (Users)>Thread Group.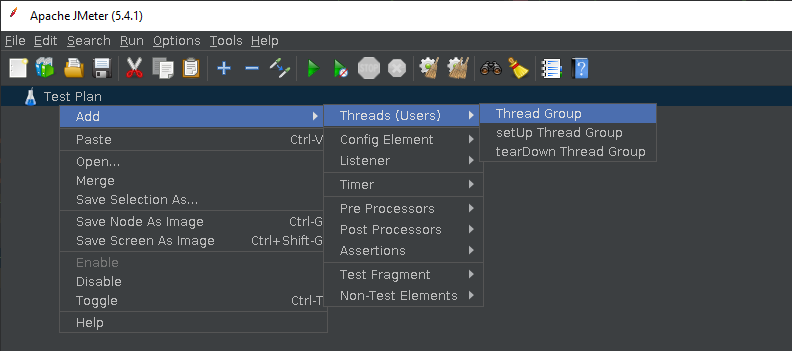
-
Thread group is the first element that must be created in any test plan.
-
All controllers and samplers must be created under a thread group.
-
Thread group element controls the number of threads(users) that JMeter will create to execute the test.
-
-
Below is the default value for
Thread Group. We will maintain the value as it is at the moment.
-
number of threads- how many thread that required to run the test plan. Each thread is completely independently of other test threads and this could used to stimulate the concurrent connection to the application. -
ramp-up period- how long should JMeter spent to create the full number of threads that specified.- number pf thread = 10
- ramp-up period = 100
- JMeter will start 1 thread every 10 second (100/10).
-
loop count- how many time thread will execute the test plan.-
number of thread = 10
-
loop count = 20
-
JMeter will execute the test plan 200 times(10 x 20).
-
-
-
Create a data ingestion element by right click on
Thread Groupand selectAdd>Config Element>CSV Data Set Config.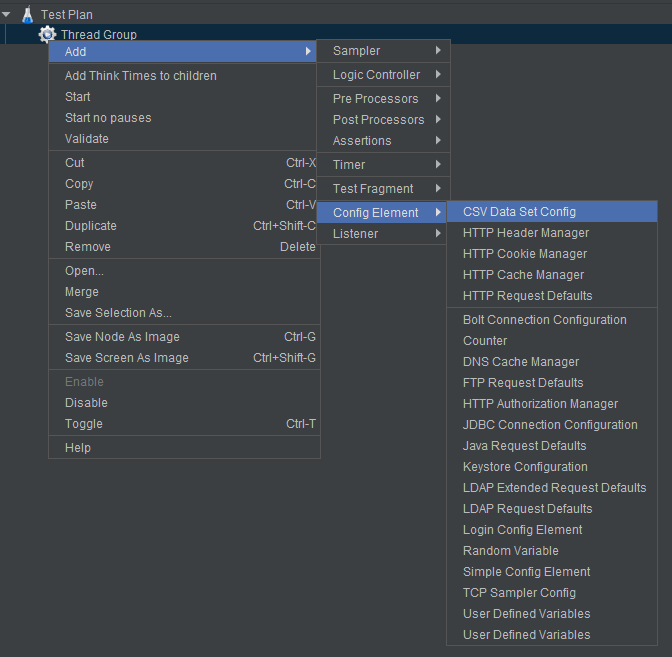
-
Click
Browseto select the data file.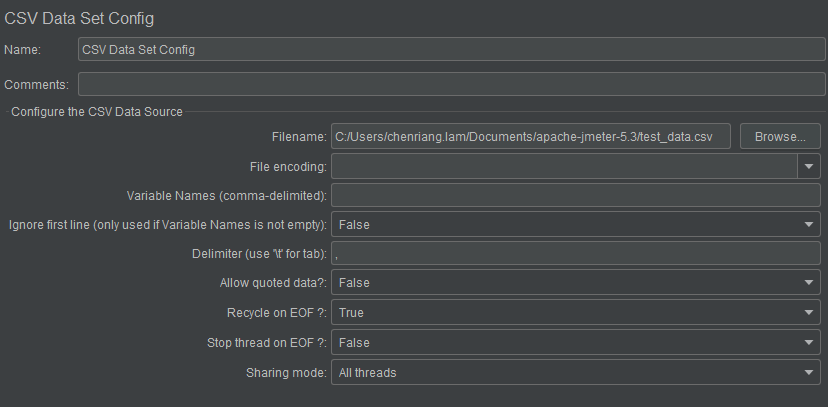
-
If the data file does not have any header, you will need to specify header name on the
Variable Namescolumn. -
In this example, our data has two headers :
nameandgreeting. (See the sample CSV data here)
-
-
Then, we will 9need to create the
HTTP Requestelement. Right click onThread Groupand selectAdd>Sampler>HTTP Request.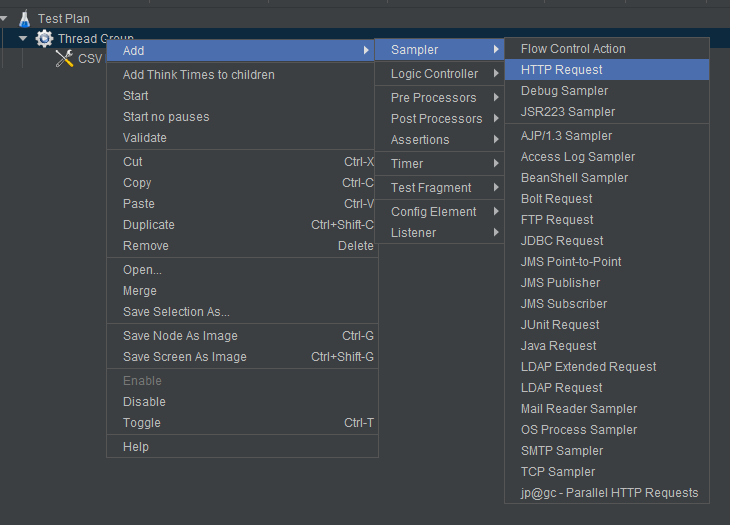
-
We need to configure the
HTTP Requestand point it to the Springboot application that created.
-
As we are sending JSON payload, we specify it in HTTP Header. Right click on
HTTP Requestand selectAdd>Config Element>HTTP Header Manager.
-
Set
Content-Typetoapplication/json.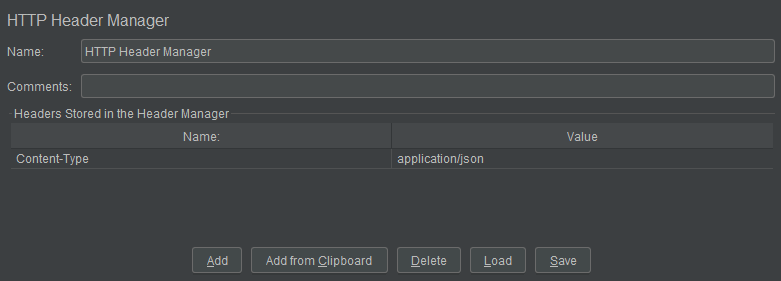
-
We also want to assert all the request getting a success response. To do that, right click on
HTTP Requestand selectAdd>Assertion>Response Assertion.
-
Set
Response CodeisEqualsto200.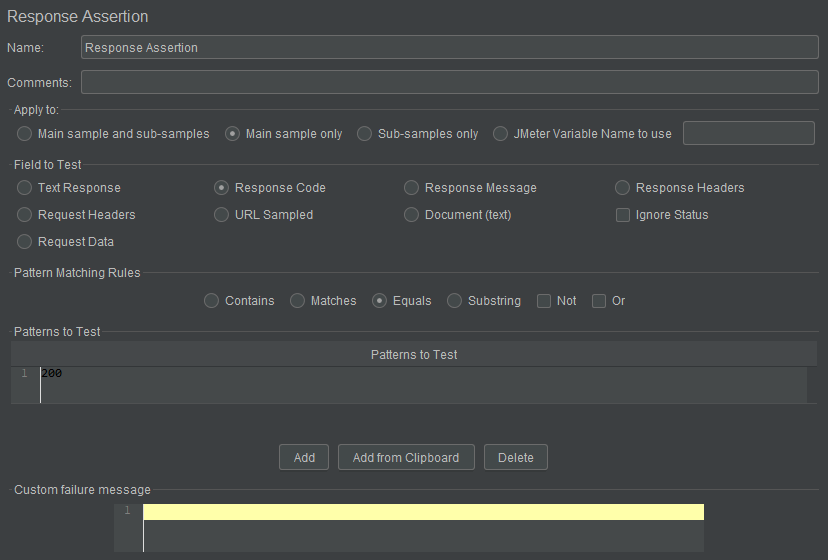
-
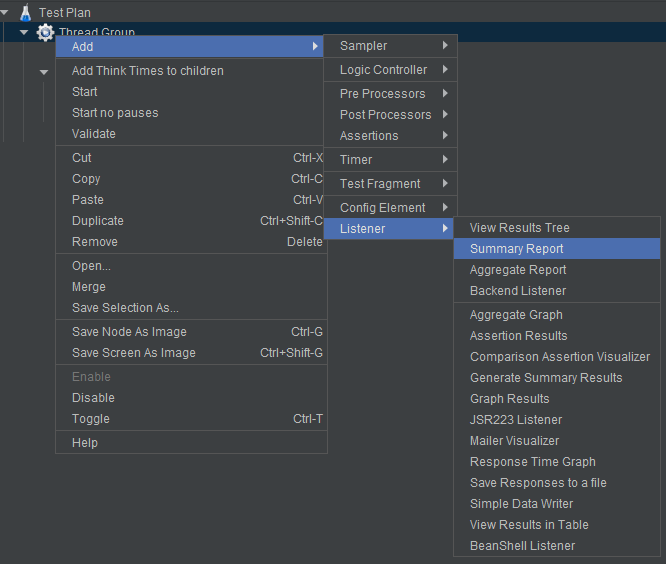
To view the response of each request. Right click on
Thread Groupand selectAdd>Listner>View Result Tree.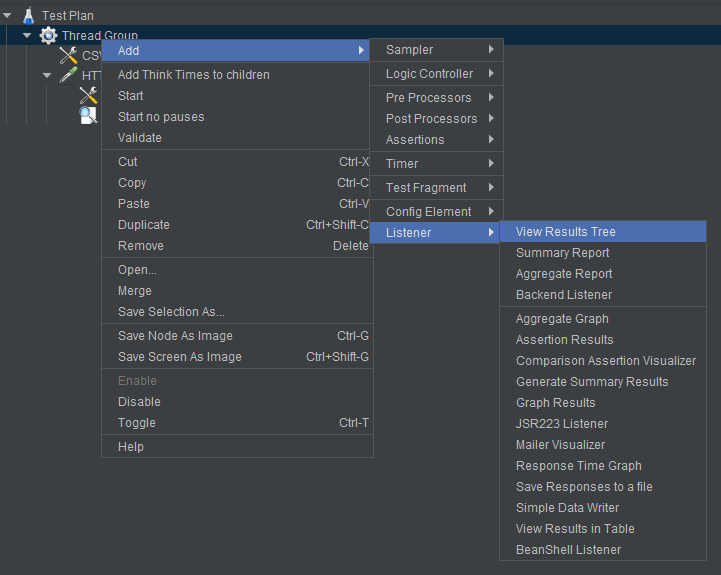
-
We can try validate the work we done so far by clicking the green color
Startbutton. Below is the sample screenshot.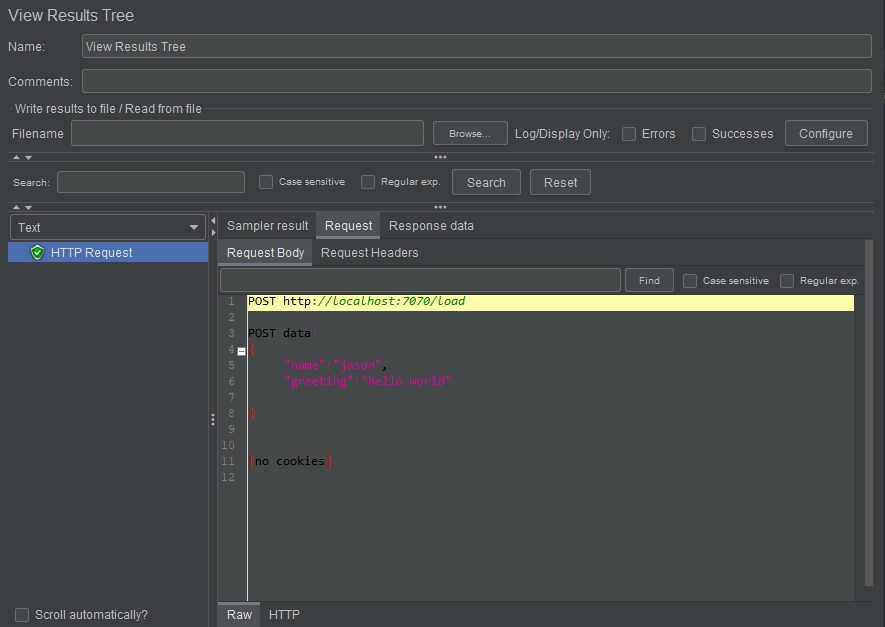
-
After validate the test plan, we going to run a end to end test. Before that, we need to add a report element to generate the statistic summary of our result.
-
Edit the test plan with more threads and loop.

-
Hit
Startbutton and view the result.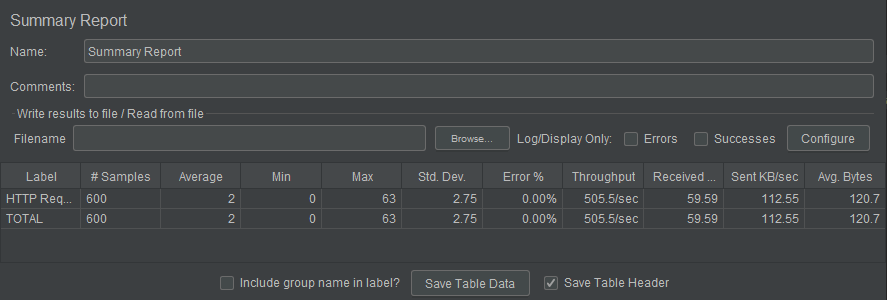
-
(Optional) We can parameterize some of the configuration with
${__P(<variable name> , <default value>)}and pass as argument in non-gui mode. Normally, I will parameterize the threads group as below :
-
Hit
Saveand done :)
Execute Test
Once the test plan is ready. We can run the real performance test in non-gui mode (CLI mode).
-
Open Command Prompt (Window) / Terminal (Linux).
-
Go to JMeter’s
binfolder. -
Execute the test.
jmeter -n -t <test plan jxm file> -Jthread=10 -Jloops=100 -l log.jtl -e -o result -
The command above will generate a HTML report in result folder.
Some useful option when running jmeter in non-gui mode.
| Option | Explaination |
|---|---|
| -n | This specifies JMeter is to run in cli mode. |
| -t |
This specify test plan location. |
| -l |
This specify the location to generate the JTL log file. |
| -e | Generate HTML report after load test |
| -o |
This specify the location to generate output folder |
Conclusion
In this article, we only cover a very simple usage of JMeter. It has lots more useful functions that will make your life easier during the performance test. I will write more about it future :)